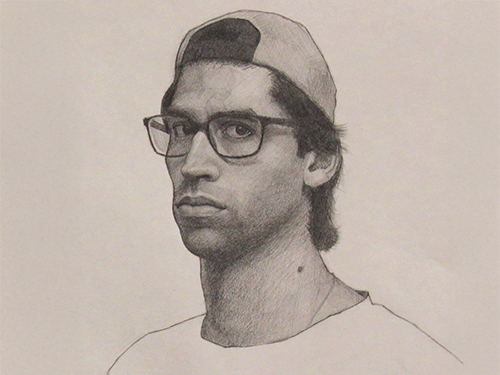
Self portraits are one of the best ways an artist can practice drawing from life. No model fees, no breaks, no uncontrollable control movement, it’s almost a perfect situation. Unfortunately, that’s not the whole story. How do you set up a self portrait? Where does the mirror go? Where do you place the light? How do you get light on both your face and your paper? How do you measure if you’re drawing yourself? All of these are valid questions to be answered during the workshop. We will cover setup, including placement of lights, mirrors, easel/surface, and your own body. We will also cover caveats to be aware of when drawing yourself and tips to control these variables
Day 1 will consist of students setting up and beginning their self portrait. Starting with the contour, students will slowly build up with linear information, capturing the larger proportions. Day 2 and 3 students will continue to build up the contour, whilst adding shadow shapes and then eventually adding value to build up the forms, working general to specific until a fully rendered self portrait is reached.
Throughout the course of the workshop a heavy emphasis will be placed on facial anatomy allowing students to understand what they are seeing on themselves. Self portraits are an excellent way to learn facial anatomy because of how intimate and close you are to your own reflection.
By the end of the workshop, students can expect to have a finished fully rendered self portrait, an understanding of how to set up a self portrait in the future, and a deeper understanding of facial anatomy.
Dates: 02/15/26, 02/22/26 and 03/01/26, 9:30-4:30
John’s teaching method includes demos lectures and one on one critiques